In this lesson, you create simple 3D objects from 2D objects.
You can create simple and complex objects by combining and modifying basic
3D shapes. You can also extrude 2D objects to create solids and surfaces by
adding height. If you extrude a closed object such as a circle, the result is a
3D solid. If you extrude an open object such as an arc or a line, the result is
a surface. A surface is a type of 3D object that has no thickness.

Draw a table stand with simple 3D solid primitives
1 Click ➤ Open.
2 In the Select File dialog box, browse to C:\My Documents\Tutorials. Open
create_table.dwg.
3 On the ribbon, click Home tab ➤ View panel ➤ Visual Styles drop-down
list ➤ Conceptual.
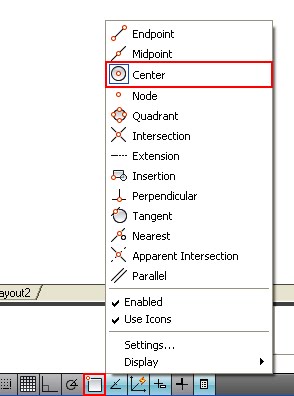
4 On the left half of the status bar, click the Object Snap button to enable
object snap mode. Right-click the Object Snap button.
should now have a box around its icon which indicates the object snap
is enabled.
drop-down ➤ Cone.

point of the circle is displayed. Click the center of the circle in the
drawing.

9 At the prompt, enter 0.5 for radius and press Enter.
10 At the prompt, enter -4 for height and press Enter.
11 Repeat the process on the other smaller circles in the drawing to create
four table legs.

Draw a table top with simple 3D solid primitives
